Citroen C4 - Brake pad replacement
This applies to my Citroen 2012 C4 1.6 HDi with automatic handbrake. For service info see Citroen C4 Service.
Automatic handbrake
Normally the handbrake is applied automatically when you turn off the engine. To keep the handbrake off when the engine is turned off, follow this procedure:
- Turn the ignition on.
- Hold the foot brake pedal down.
- Apply the handbrake switch
- The handbrake will release and there will be a bleeping sound.
- Turn ignition off
- The handbrake will remain off until you start the engine again.
Front Brakes
When checking the wear on the brakes, you should check both the inner and the outer pads; the inner pads can wear much quicker than the outer pads.
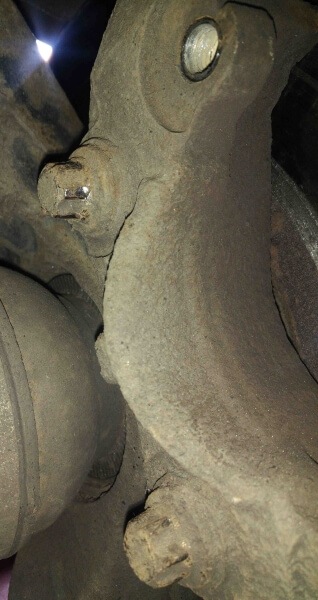
- The brake caliper (which is floating, which means it is free to move a small amount side to side), is held by two screws with T45 Torx heads. There is a plastic cover around the head of the screw, with a plastic cap that you can prise off with a screwdriver so that you can access the screw. Unscrew the caliper with a good quality Torx T45 bit.
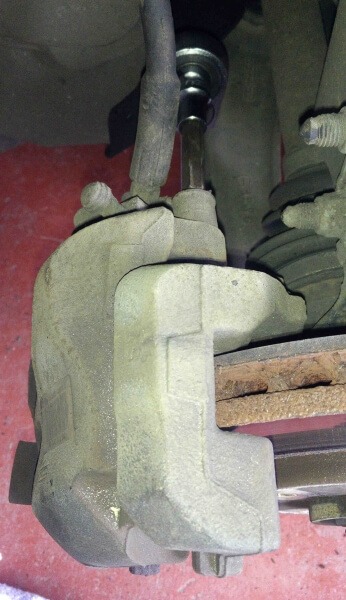
- When you are unscrewing these screws, they may seem to take forever to unscrew out of the caliper. You will probably need to help them to move out by levering the threads with a screwdriver as you turn the screw, see picture:
- Once the screws are out of the floating caliper, remove the spring on the outside of the floating caliper, and prise the caliper away from the discs. Remove the old pads.
- Prop the caliper up so it is not hanging by the flexible brake hose. I use reusable cable ties to hold it up.
- Remove the brake reservoir cap in the engine bay.
- Next you have to push in the piston with a G-clamp. Make sure that the clamp is not operating at an angle or you could damage things. Compress it slowly and check every so often that the brake fluid is not overflowing out of the reservoir.
- Next give the caliper a good cleaning and remove any build up of dirt and deposits, especially where the pads are located. You may find that a file is useful for this. You want the new pads to be able to move relatively freely, otherwise your brakes may bind - i.e: the pads keep rubbing against the disc and this causes wear and overheating. Also clean the piston gently with a cloth and solvent. Note that you should pump the brakes (see below) after doing one side so that the brake fluid reservoir does not overflow.
- When reassembling I like to put a small dab of thread lock on the caliper screws to ensure that they don’t loosen
- Also check that you have not twisted the flexible brake hose.
- When you have it all reassembled, pump the brakes a few times to push the pistons onto the pads so as to take up any slack. Then spin the wheels and check that the brakes are not sticking - if they are, something is not right and you will have to investigate.
- Replace the brake reservoir cap.
- Use somewhere safe to check the brakes are working okay before you go out on a journey.
Front Disc replacement
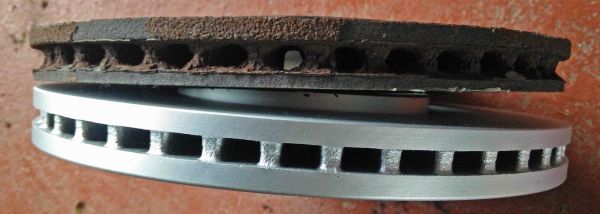
If the discs are worn to less than 20mm or 24mm thickness (this depends on the particular model), then you need new discs. Mine were well worn!
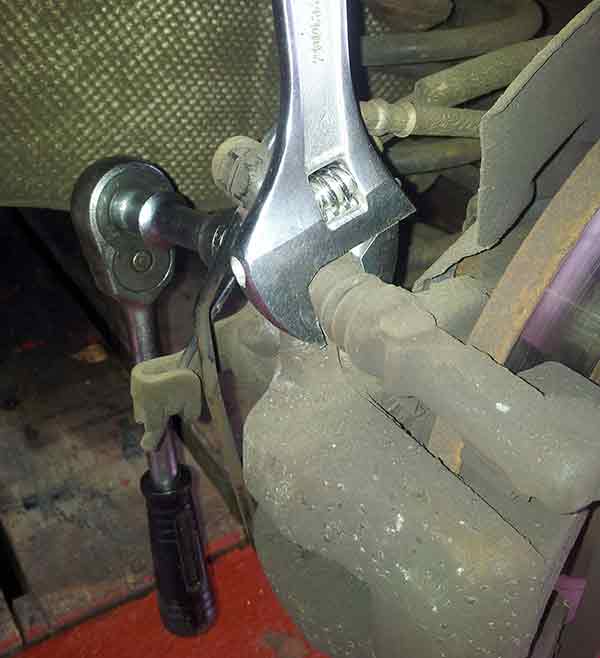
They are not hard to fit - if you have the right tools. The fixed part of the caliper assembly has to be removed in order to remove the disc. It is held in by two bolts that will be very tight. You can spray some WD40 or similar where the bolts protrude out the other side to help.
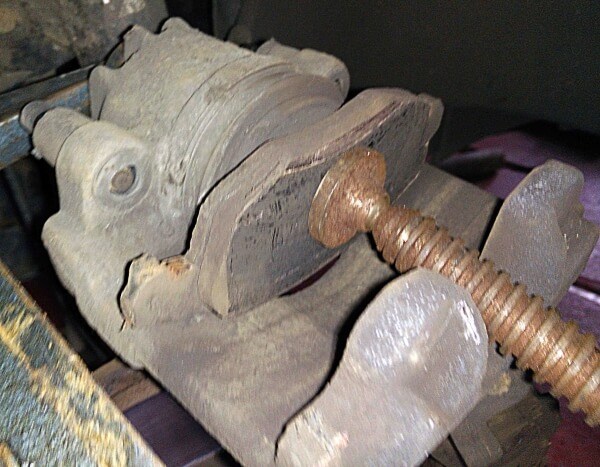
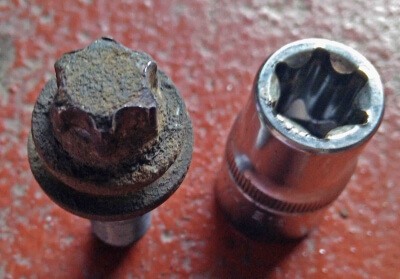
On mine the two bolts have special heads that need a special Torx E16 socket to remove them.
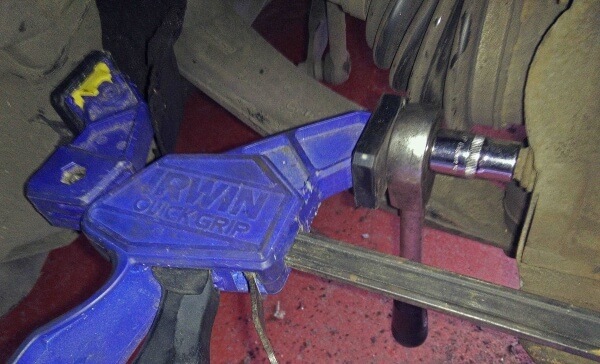
In my case, I needed to stop the socket coming off the head of the bolt, so to keep the socket firmly on to the head of the bolt, I used a reverse clamp like this:
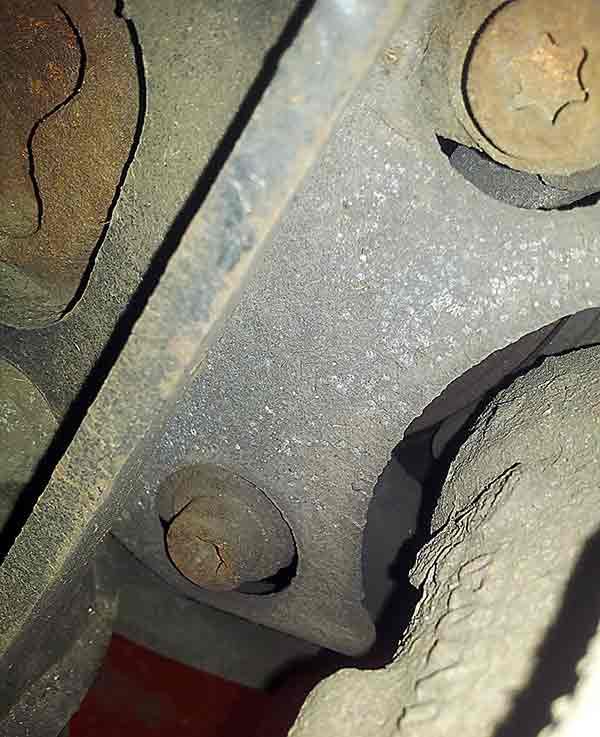
Make sure that you remove the two small Torx head screws holding the disc before attempting to remove the old disc!
If you are lucky, some judicious hammering with a heavy hammer will loosen it. If not, you will need a hub puller tool, so check before you start that you can borrow one if you have not already got one - just in case.
Replacement is a straightforward reverse of the above. I like to put a small dab of thread lock on the bolts that hold the caliper assembly in place.
Don’t over-tighten the two small screws on the disc - their only purpose is locate the disc properly - the wheel nuts hold the disc tightly in position.
Back brakes
As far as I am aware there are two makes of back brake that might be on this model, Lucas or Bosch. The one described here is Bosch.
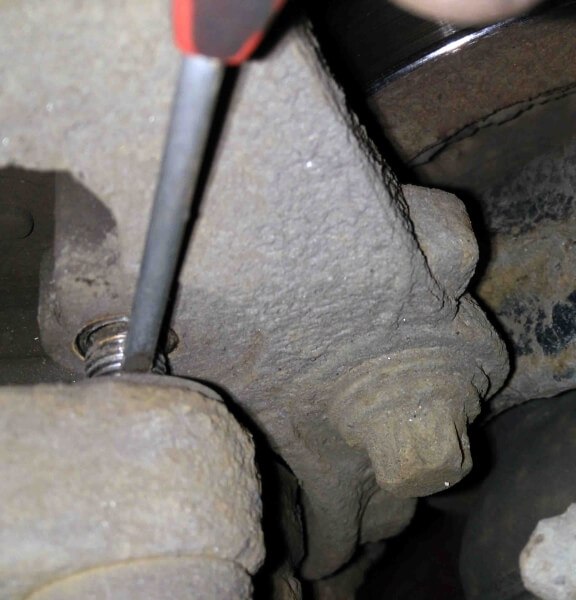
- The brake caliper (which is floating, which means it is free to move a small amount side to side), is held by two screws with T50 Torx heads.
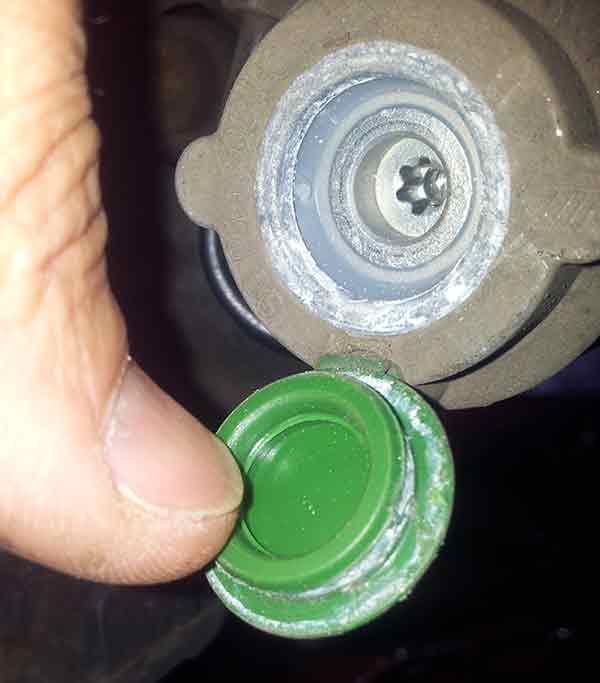
- The lower one has an attachment that should be removed first, there is a plastic cap which should be prized open, then use a Torx30 to unscrew it.
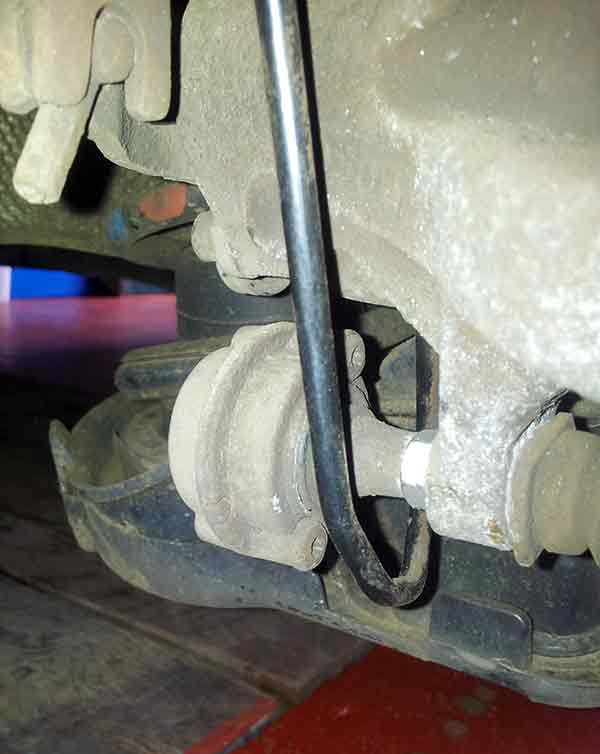
- To unscrew the caliper screws, you need to hold the part that it screws into, see picture.
- Unscrew the caliper - use good quality Torx T50 bits for this. When you have the caliper unscrewed, prop it up on something so it is not hanging by the brake lines. I use reusable cable ties to hold it up. Remove the old pads and the metal clips.
- Remove the brake reservoir cap in the engine bay.
- Next you have to push in the pistons. These pistons have to be wound as they are pushed in, so you should get the proper tool for this. You can get cheap ones on eBay or similar, I got an excellent one with attachments for various different brakes for £16. If you attempt pushing in the piston without a special tool I can only wish you the best of luck as you will certainly need it !
- When pushing in the piston check every so often that the brake fluid is not overflowing out of the reservoir. The piston on the right-side brake must be wound clockwise. The piston on the left-side brake must be wound anticlockwise. They should be nearly impossible to turn in the opposite direction. Note that you should pump the brakes (see below) after doing one side so that the brake fluid reservoir does not overflow.
- Next give the caliper a good cleaning and remove any build up of dirt and deposits, especially where the pads are located. You may find that a file is useful for this. You want the new pads to be able to move relatively freely, otherwise your brakes may bind - i.e: the pads keep rubbing against the disc and this causes wear and overheating. Also clean the piston gently with a cloth and solvent.
- I found that it was easier to reassemble the caliper assembly by taking the fixed part of the caliper off, this is also held by two Torx T50 screws.
- When reassembling I like to put a small dab of thread lock on the caliper screws to ensure that they don’t loosen.
- When you have it all reassembled, pump the brakes a few times to push the pistons onto the pads so as to take up any slack. Then spin the wheels and check that the brakes are not sticking - if they are, something is not right and you will have to investigate.
- Replace the brake reservoir cap.
- Use somewhere safe to check the brakes are working okay before you go out on a journey.

Rationale: Every logical argument must be defined in some language, and every language has limitations. Attempting to construct a logical argument while ignoring how the limitations of language might affect that argument is a bizarre approach. The correct acknowledgment of the interactions of logic and language explains almost all of the paradoxes, and resolves almost all of the contradictions, conundrums, and contentious issues in modern philosophy and mathematics.
Site Mission
Please see the menu for numerous articles of interest. Please leave a comment or send an email if you are interested in the material on this site.
Interested in supporting this site?
You can help by sharing the site with others. You can also donate at where there are full details.